Zero Touch Part 1 - HP IMC


Energetic 90s bard, MC Hammer, once made the boastful claim; 'U can't touch this.'
That's not just the hook of a pop-rap jam, it is an actual quote from a network engineer during a Proof of Concept that I ran recently.
The 'this' in question was a branch router, an HP MSR1002-4, that I was putting through its paces for a prospective customer, looking to refresh their hub-and-spoke network.
The warning came because the customer did not want me to configure the router at all as part of a zero-touch test.
Zero touch
What?
By zero touch I am referring to the ability of a factory default device to obtain a configuration, and become live on the network, without a console cable in sight.
Why?
Think about all the process in place to bring online a single remote branch router at a retail site.
- Hardware - how does it get to site? Does it need to be pre-staged?
- On-site engineer - how much work will they need to perform? Will they need to be an aspiring NetOps engineer armed with a console cable to install a basic config? Or just a a delivery driver who knows how to plug an RJ-45 into the correct port?
- NetOps - how much co-ordination with onsite do they need? Do they have to copy-and-paste the config down to the device once it has booted?
Pre-staging hardware, skilled onsite resource, NetOps time and process. All these things cost money.
Any interaction provides an opportunity for human error. I worked for a telco in the UK where an ex-colleague pressed right-click in the wrong putty session during a new CE install and downed 50+ live sites. That was a bad day at the office.
How?
For this demo I will be using:
- HP IMC 7.1 Enterprise Edition
If you're not familiar with Intelligent Managment Centre (IMC), it is a net mgmt. platform from HP which has been through a makeover recently.
Free trial and more info here.
For loads of additional insight check out the KontrolIssues blog. - IMC Branch Intelligent Management System (BIMS)
Its a software module add-on to the base IMC edition focused on remote CPE mgmt. - TR-069 capable device
This is our CPE. For this demo I used an HP MSR1002-4. - A USB stick
Any will do, only a few KB free space required.
Demo
Step One - Create A Config Template
This is the config you wish to apply to the CPE on boot-up.
Go to IMC:
Service > BIMS > Configuration Management > Config Templates
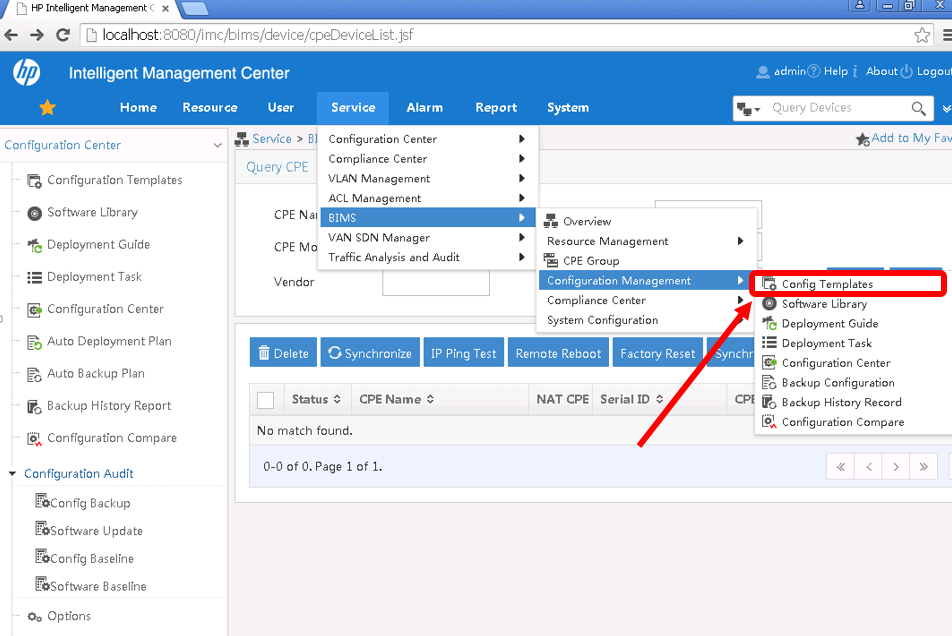
Here you can create a folder to store your config templates by hitting Add, give the new folder a name then click on it.
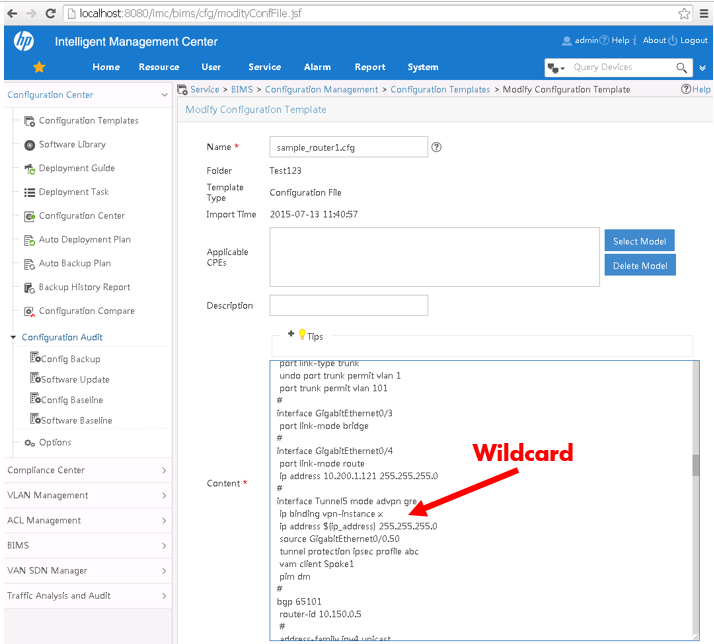
Now to create a config template just hit 'Add' and name it. I'm creating a full config file so I select 'Configuration File' from the 'Template Type' dropdown. Then add the lines of config in the 'Content' box and 'Save'.
So that templates can be used for multiple devices, there is the option to use wildcard strings for parameters in the template. Just use '$[string]' e.g. '$[wan_address]'. You will then be asked input the relevant values when creating a deployment task (Step Four below).
Step Two - Create a USB template
This is the small configlet that is loaded to the USB. It contains minimal config to ensure the CPE points to the CWMP server to retrieve its main config file.
An example config named 'System_zero configuration.cfg' can be found here:
Service > BIMS > Configuration Manamgent > Configuration Template > Default Folder
I'm using a simple file tailored to my network which I save to the root of the USB and name autodeploy.cfg.
interface GigabitEthernet0/4
 port link-mode route
  ip address 10.200.1.121 255.255.255.0      #WAN port, could be DHCP allocated
#
cwmp
cwmp enable
cwmp acs url http://10.200.1.132:9090        #BIMS server URL
cwmp acs username bims
cwmp acs password simple bims
cwmp cpe username bims
cwmp cpe password simple bims
cwmp cpe inform interval enable
cwmp cpe inform interval 15
Note that the WAN port is configured in this case. If a DHCP server is available on the public network at device boot, that can be used for IP address allocation and repointing to the BIMS server via DHCP Option 43.
Step Three - Create a virtual CPE
Once you have the configs ready to roll you need the IMC server to be aware of the CPE so that the correct config template can be downloaded to the device when it comes online.
Virtual CPEs are identified by Serial Number and OUI. Collecting and installing this data can be a laborious task. Fine in the lab with a single router but what about hundreds or even thousands of CPEs?
We're talking software here though so there are numerous methods to create Virtual CPEs with varying levels of automation:
-
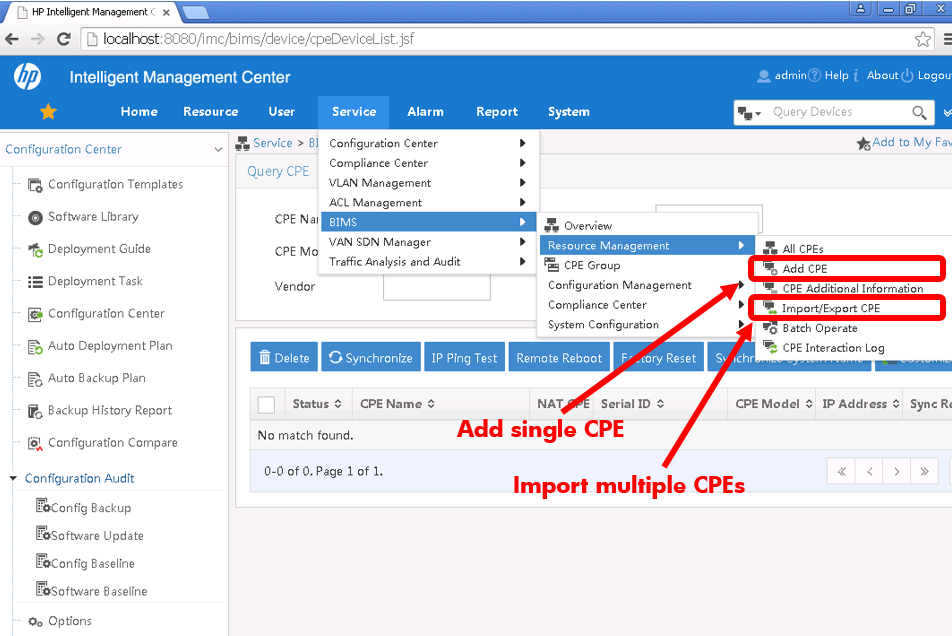
You can input this info manually:
Service > BIMS > Resource Management > Add CPE -
Alternatively a barcode scanner can be used to scan in the details.
-
A CSV file can be imported to quickly create VCPEs en masse:
Service > BIMS > Resource Management > Import/Export CPE -
IMC has a REST API which can be used to perform the import. More on that in a future post.
Step Four - Create an Auto Deploy Config task
Now to link the virtual CPEs and the config templates together in an IMC Deployment task.
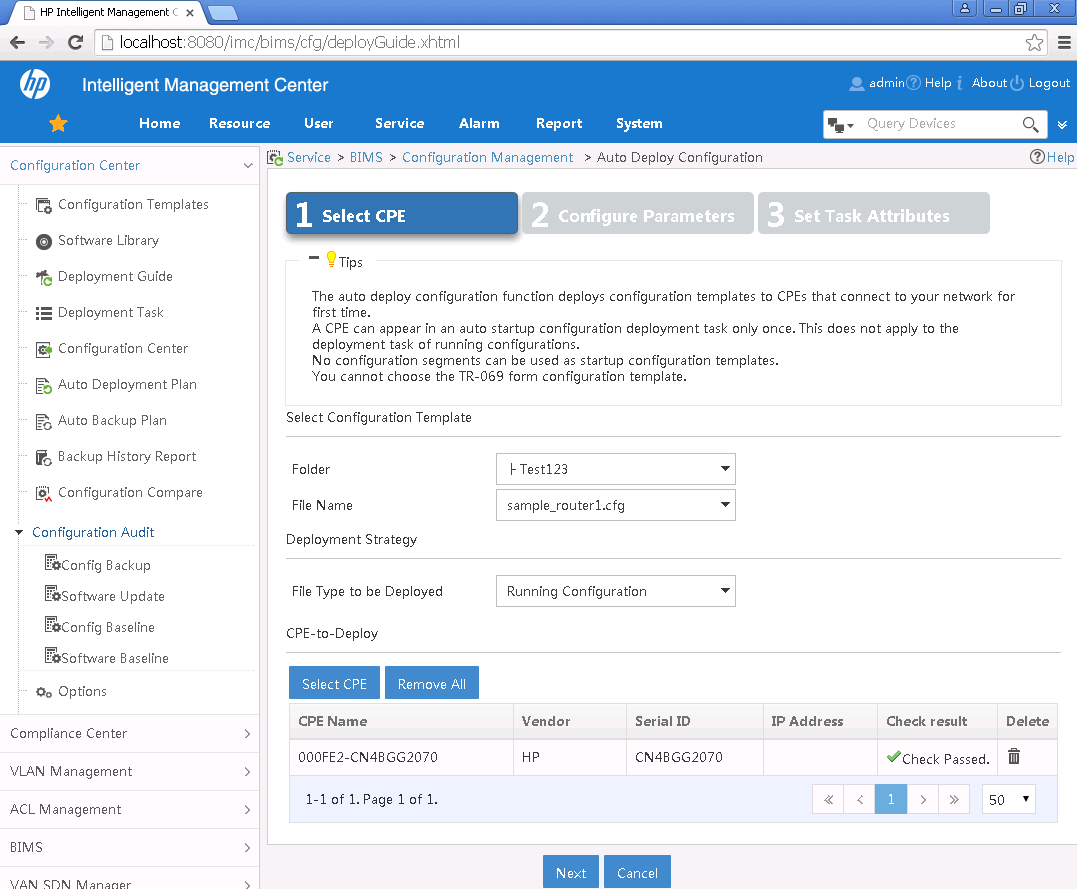
Service > BIMS > Configuration Management > Deployment Guide > Auto Deploy Configurtion > By CPE
Select the Config Template, Select the CPE or group of CPEs.
Next up, if your Config Template contains wildcards, you will be asked to enter values for each one of these variables.
With all the values entered the task is now complete, waiting for the CPEs to boot and communicate with the server.
Step Five - Time to boot the box
Ensure the USB stick is inserted into the router then power on.
Bootup process
- The router will load the USB autodeploy config to obtain its WAN-facing IP address and BIMS server details. Again, this could be off-loaded to a DHCP server if available.
- Server and router will communicate via CWMP.
- Config template assoicated with the CPE will be downloaded to the running config of the router.
- Router now online.
Here's a video of the whole process:
Closing comments
That covers the basics of zero touch with BIMS but what I've found really useful is how other processes can be fired up after boot to bring a fully functioning, secure device online. We're talking automatically building VPN tunnels, BGP sessions secured with IPSEC.
More on that in Part Two.